You’ve chosen e4 and JavaFX as the technologies to implement your cool rich client application. Congrats!
In the first iteration you’ve implemented all the form UIs you need in your application which you made flashy with the help of CSS, animations for perspective switches, lightweight dialogs as introduced in e(fx)clipse 2.0, … .
In the 2nd iteration your task now might be to implement some scripting support but for that you require an editor who at least supports lexical syntax highlighting. So you now have multiple choices:
- Use a WebView and use an editor written in JavaScript like Orion
- Use the StyledTextArea shipped with e(fx)clipse 2.0 and implement all the hard stuff like paritioning, tokenizing, …
- Get e(fx)clipse 2.1 and let the IDE generate the editor for you
If you decided to go with the last option the following explains how you get that going by developing a e4 JavaFX application
like shown in this video
Get e(fx)clipse 2.1.0
As of this writing e(fx)clipse 2.1 has not been released so you need to grab the nightly builds eg by simply downloading our All-in-One build.
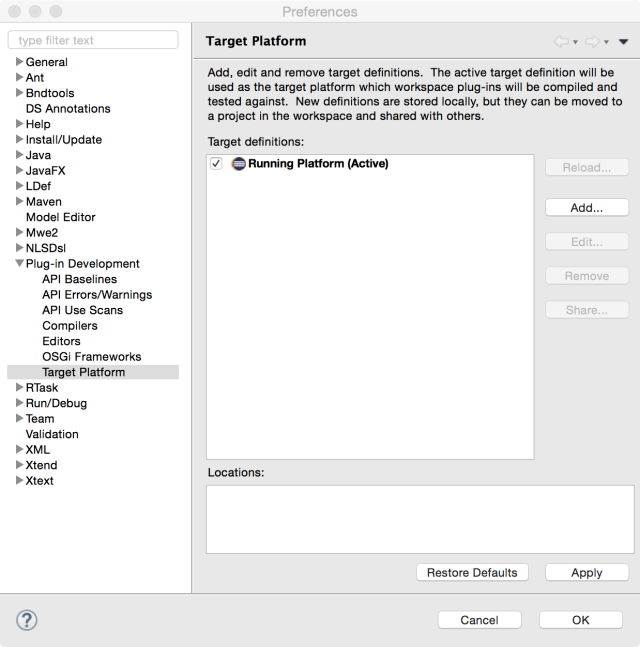
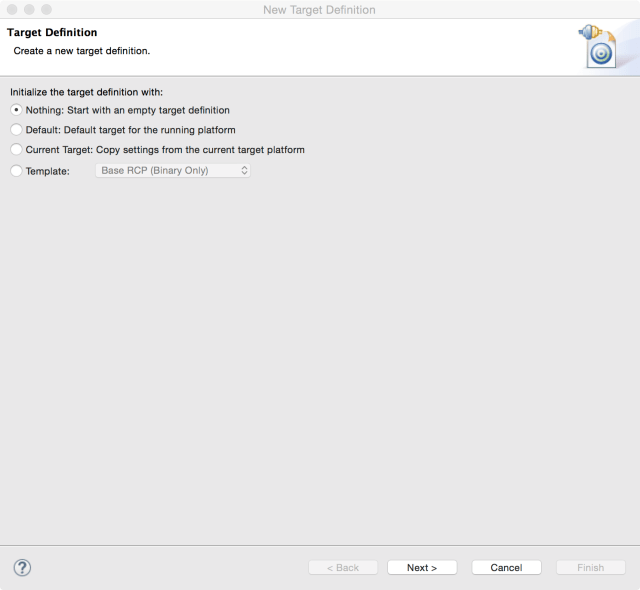
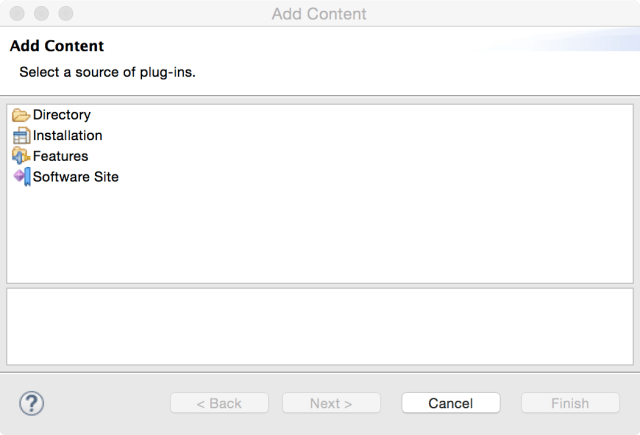
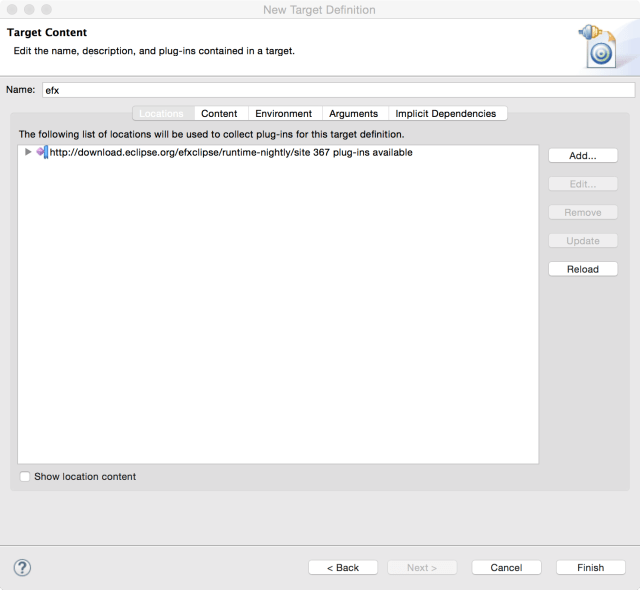
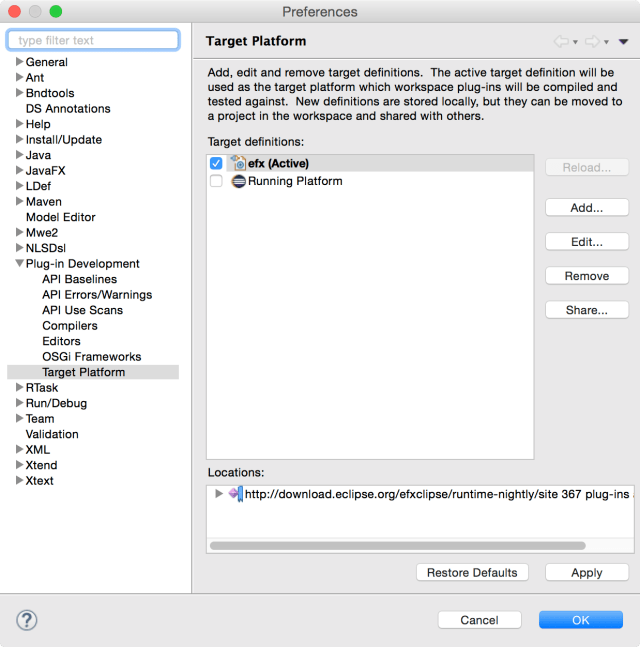
Set up a target platform
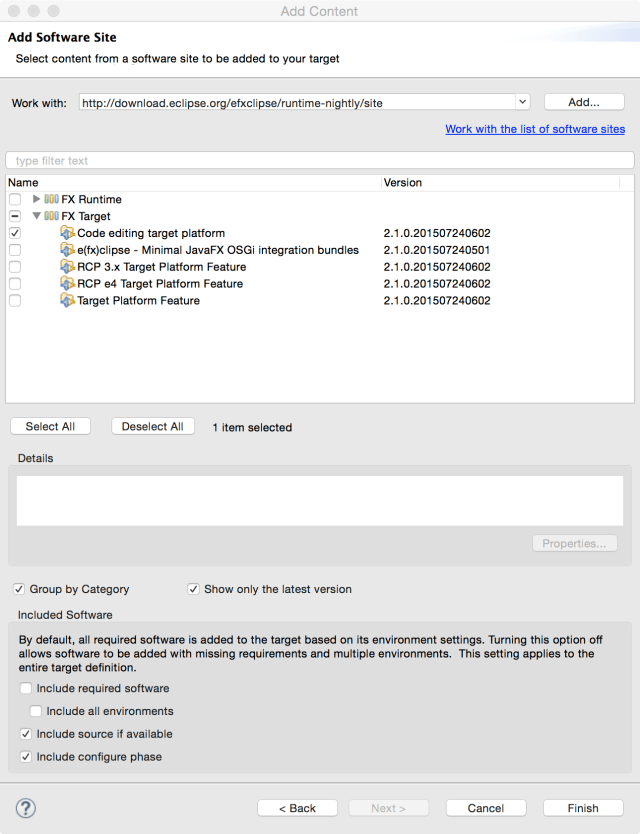
We have a self-contained target platform feature (org.eclipse.fx.code.target.feature) available from our runtime-p2 repository to get started super easy.
Warning: Make sure you uncheck “Include required software” because the target won’t resolve if you have that checked!
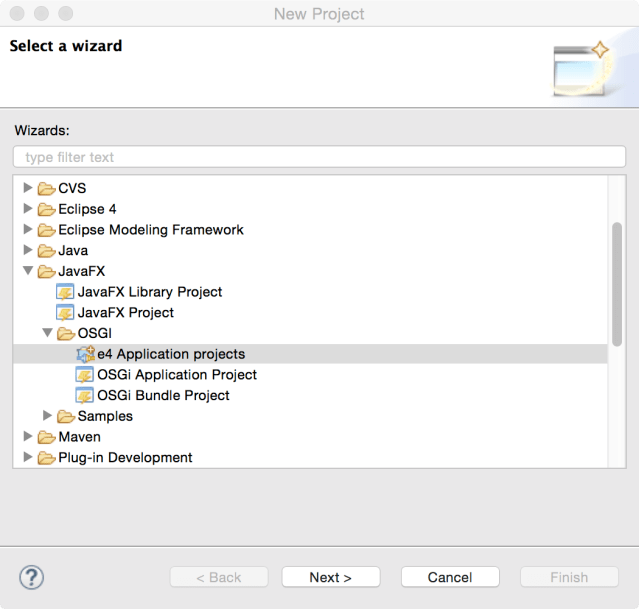
Setup the project
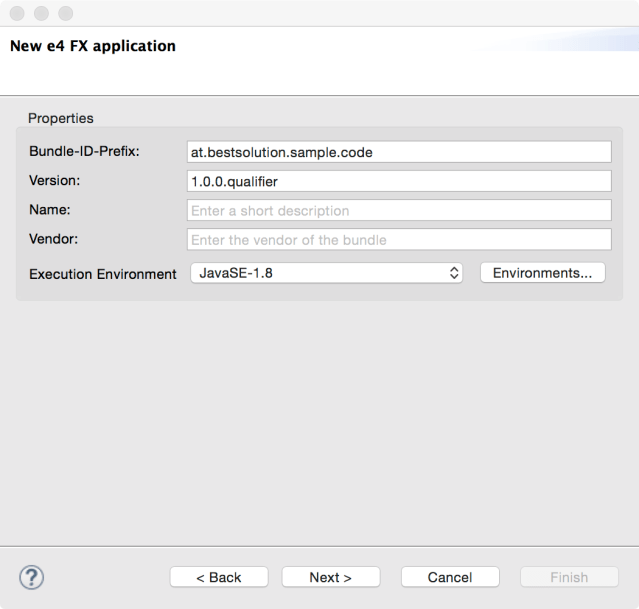
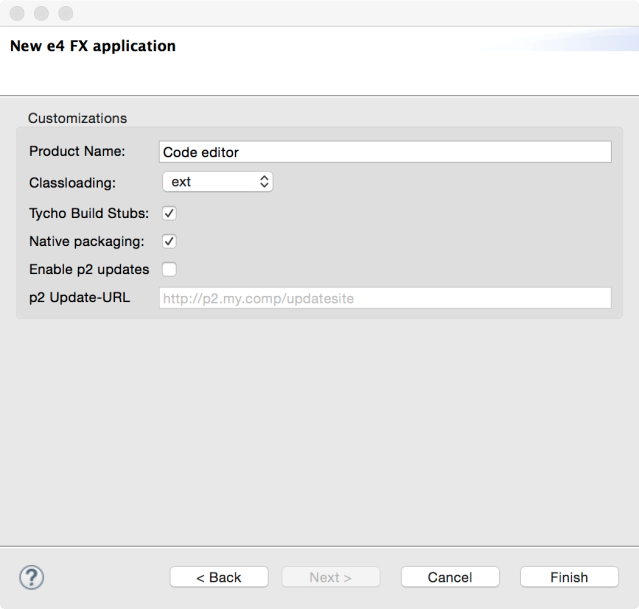
The project setup is done like you are used to for all e4 on JavaFX applications.
The wizard should have created:
- at.bestsolution.sample.code.app: The main application module
- at.bestsolution.sample.code.app.feature: The feature making up the main application module
- at.bestsolution.sample.code.app.product: The product definition require for exporting
- at.bestsolution.sample.code.app.releng: The release engineering project driving the build
Now we need to add some dependencies to your MANIFEST.MF:
org.eclipse.fx.core: Some Core APIsorg.eclipse.fx.code.editor: Core (=UI Toolkit independent) APIs for code editorsorg.eclipse.fx.code.editor.fx: JavaFX dependent APIs for code editorsorg.eclipse.text: Core APIs for text parsing, …org.eclipse.fx.text: Core APIs for text parsing, highlighting, …org.eclipse.fx.text.ui: JavaFX APIs for text parsing, highlighting, …org.eclipse.fx.ui.controls: Additional controls for eg a File-System-Viewerorg.eclipse.osgi.services: OSGi-Service APIs we make use of when generateing DS-Servicesorg.eclipse.fx.core.di: Dependency Inject addonsorg.eclipse.fx.code.editor.e4: code editor integration to e4org.eclipse.fx.code.editor.fx.e4: JavaFX code editor integration to e4
For export reasons also add all those bundles to the feature.xml in at.bestsolution.sample.code.app.feature.
Generate editor infrastructure
Having everything configured now appropriately we start developing:
- Create package
at.bestsolution.sample.code.app.editor - Create a file named
dart.ldefand copy the following content into itpackage at.bestsolution.sample.code dart { partitioning { partition __dftl_partition_content_type partition __dart_singlelinedoc_comment partition __dart_multilinedoc_comment partition __dart_singleline_comment partition __dart_multiline_comment partition __dart_string rule { single_line __dart_string "'" => "'" single_line __dart_string '"' => '"' single_line __dart_singlelinedoc_comment '///' => '' single_line __dart_singleline_comment '//' => '' multi_line __dart_multilinedoc_comment '/**' => '*/' multi_line __dart_multiline_comment '/*' => '*/' } } lexical_highlighting { rule __dftl_partition_content_type whitespace javawhitespace { default dart_default dart_operator { character [ ';', '.', '=', '/', '\\', '+', '-', '*', '<', '>', ':', '?', '!', ',', '|', '&', '^', '%', '~' ] } dart_bracket { character [ '(', ')', '{', '}', '[', ']' ] } dart_keyword { keywords [ "break", "case", "catch", "class", "const", "continue", "default" , "do", "else", "enum", "extends", "false", "final", "finally", "for" , "if", "in", "is", "new", "null", "rethrow", "return", "super" , "switch", "this", "throw", "true", "try", "var", "void", "while" , "with" ] } dart_keyword_1 { keywords [ "abstract", "as", "assert", "deferred" , "dynamic", "export", "external", "factory", "get" , "implements", "import", "library", "operator", "part", "set", "static" , "typedef" ] } dart_keyword_2 { keywords [ "async", "async*", "await", "sync*", "yield", "yield*" ] } dart_builtin_types { keywords [ "num", "String", "bool", "int", "double", "List", "Map" ] } } rule __dart_singlelinedoc_comment { default dart_doc dart_doc_reference { single_line "[" => "]" } } rule __dart_multilinedoc_comment { default dart_doc dart_doc_reference { single_line "[" => "]" } } rule __dart_singleline_comment { default dart_single_line_comment } rule __dart_multiline_comment { default dart_multi_line_comment } rule __dart_string { default dart_string dart_string_inter { single_line "${" => "}" //TODO We need a $ => IDENTIFIER_CHAR rule } } } integration { javafx { java "at.bestsolution.sample.code.app.editor.generated" e4 "at.bestsolution.sample.code.app.editor.generated" } } } - Xtext will prompt to add the Xtext nature to your project
 . Choose “YES”
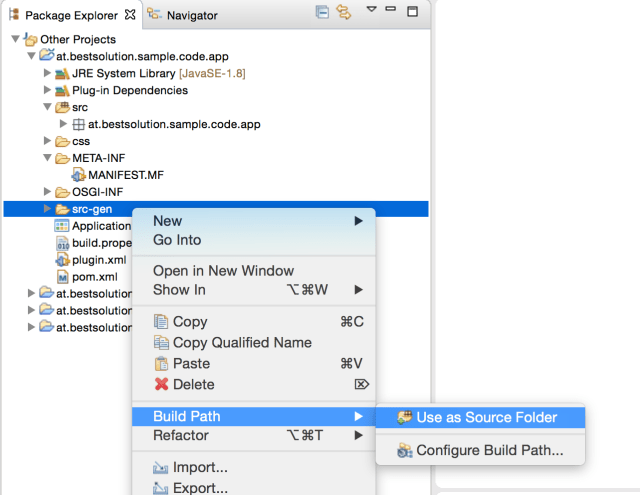
 - The sources are generated into the
src-genfolder you should add that one to your build path
- It’s important to note that beside the files generated by the ldef-Language there are 2 files generated to your
OSGi-INF-Folder by DS-Tooling fromca.ecliptical.pde.ds
I won’t explain the details of the dart.ldef-File because there’s already a blog post with a detailed description of the file.
The only part that is new is the integration section:
integration {
	javafx {
		java "at.bestsolution.sample.code.app.editor.generated"
		e4 "at.bestsolution.sample.code.app.editor.generated"
	}
}
who configures the code generator to:
- Generate Java code for the partitioning and tokenizing
- Generate e4 registration informations in terms of OSGi-Services
In contrast to the last blog where we’ve run our stuff in an NONE-OSGi/NONE-e4-world where we had to wire stuff ourselves this is not needed this time because the Eclipse DI container will take care of that!
Define a Filesystem-Viewer-Part
To browse the filesystem we need a viewer which might look like this:
package at.bestsolution.sample.code.app;

import java.net.URI;
import java.nio.file.Path;
import java.nio.file.Paths;

import javax.annotation.PostConstruct;
import javax.inject.Inject;
import javax.inject.Named;

import org.eclipse.e4.core.di.annotations.Optional;
import org.eclipse.e4.ui.di.PersistState;
import org.eclipse.fx.code.editor.services.TextEditorOpener;
import org.eclipse.fx.core.Memento;
import org.eclipse.fx.ui.controls.filesystem.FileItem;
import org.eclipse.fx.ui.controls.filesystem.ResourceEvent;
import org.eclipse.fx.ui.controls.filesystem.ResourceItem;
import org.eclipse.fx.ui.controls.filesystem.ResourceTreeView;

import javafx.collections.FXCollections;
import javafx.scene.layout.BorderPane;

public class ResourceViewerPart {
	@Inject
	TextEditorOpener opener;

	private Path rootDirectory;

	private ResourceTreeView viewer;

	@PostConstruct
	void init(BorderPane parent, Memento memento) {
		viewer = new ResourceTreeView();

		if( rootDirectory == null ) {
			String dir = memento.get("root-dir", null);
			if( dir != null ) {
				rootDirectory = Paths.get(URI.create(dir));
			}
		}

		if( rootDirectory != null ) {
			viewer.setRootDirectories(FXCollections.observableArrayList(ResourceItem.createObservedPath(rootDirectory)));
		}
		viewer.addEventHandler(ResourceEvent.openResourceEvent(), this::handleOpenResource);
		parent.setCenter(viewer);
	}

	@Inject
	@Optional
	public void setRootDirectory(@Named("rootDirectory") Path rootDirectory) {
		this.rootDirectory = rootDirectory;
		if( viewer != null ) {
			viewer.setRootDirectories(FXCollections.observableArrayList(ResourceItem.createObservedPath(rootDirectory)));
		}
	}

	private void handleOpenResource(ResourceEvent<ResourceItem> e) {
		e.getResourceItems()
			.stream()
			.filter( r -> r instanceof FileItem)
			.map( r -> (FileItem)r)
			.filter( r -> r.getName().endsWith(".dart"))
			.forEach(this::handle);
	}

	private void handle(FileItem item) {
		opener.openEditor(item.getUri());
	}

	@PersistState
	public void rememberState(Memento memento) {
		if( rootDirectory != null ) {
			memento.put("root-dir", rootDirectory.toFile().toURI().toString());
		}
	}
}
Define the application
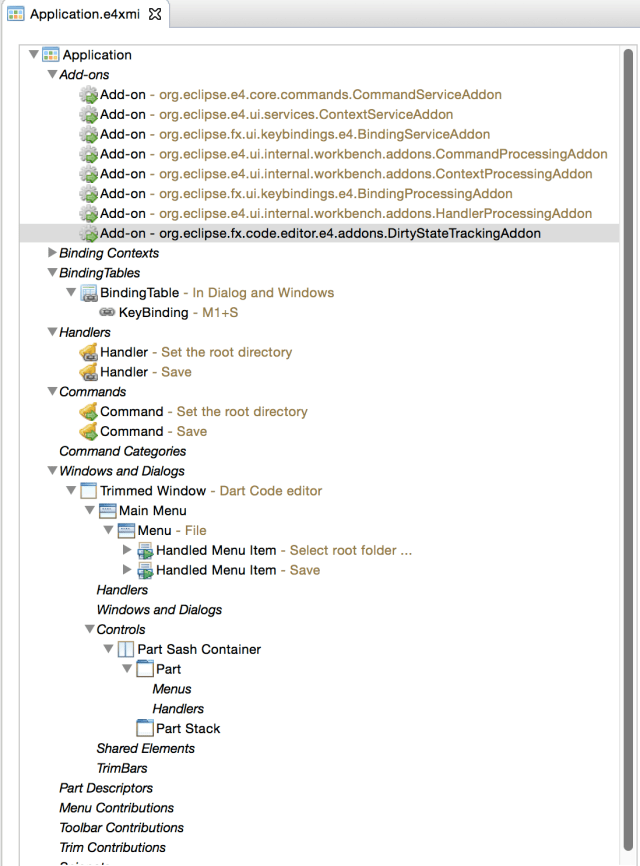
e4 applications as you already know are not defined by code but with the help of the e4 application model which is stored by default in e4xmi-Files. The final model has to looks like this:
The important parts are:
- DirtyStateTrackingAddon: Is a special addon who tracks the dirty state of the editor and should be added to the applications Addon section
- Handler: We using a framework handler
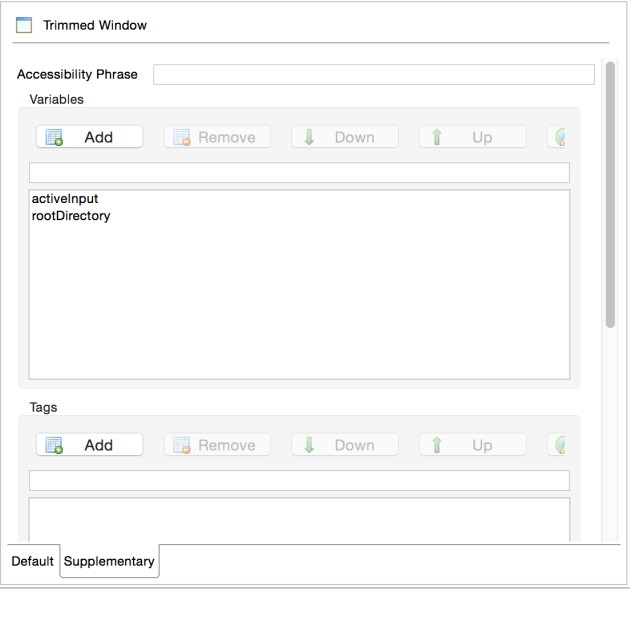
org.eclipse.fx.code.editor.e4.handlers.SaveFile - Window-Variables: We have 2 special variables defined at the window level (
activeInput,rootDirectory)
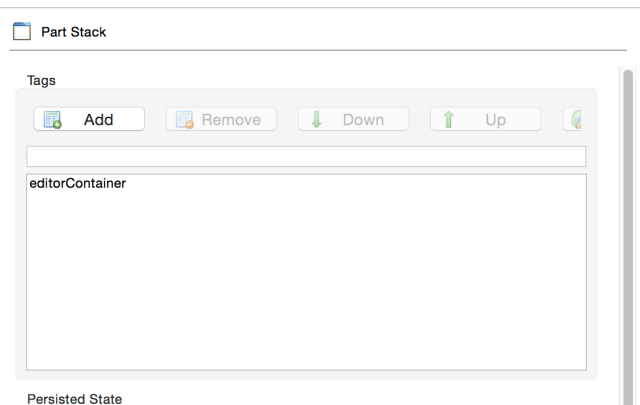
- PartStack-Tags: We tagged the Part Stack who is hosting the editors with
editorContainer
- Resource Viewer Part: We register the resource viewer implementation from above to the part definition
- Root Directory Handler: To set the root directory we have a handler who looks like this
package at.bestsolution.sample.code.app.handler;

import java.io.File;
import java.nio.file.Path;
import java.nio.file.Paths;

import org.eclipse.e4.core.di.annotations.Execute;
import org.eclipse.fx.core.di.ContextValue;

import javafx.beans.property.Property;
import javafx.stage.DirectoryChooser;
import javafx.stage.Stage;

public class SetRootDirectory {

	@Execute
	public void setRootDirectory(@ContextValue("rootDirectory") Property<Path> rootDirectory, Stage stage) {
		DirectoryChooser chooser = new DirectoryChooser();
		File directory = chooser.showDialog(stage);
		if( directory != null ) {
			rootDirectory.setValue(Paths.get(directory.getAbsolutePath()));
		}
	}
}
Add the highlightings
The final step before we launch the application is that you need to set the styles inside your default.css
.styled-text-area .dart.dart_default {
    -styled-text-color: rgb(0, 0, 0);
}

.styled-text-area .dart.dart_operator {
    -styled-text-color: rgb(0, 0, 0);
}

.styled-text-area .dart.dart_bracket {
    -styled-text-color: rgb(0, 0, 0);
}

.styled-text-area .dart.dart_keyword {
    -styled-text-color: rgb(127, 0, 85);
    -fx-font-weight: bold;
}

.styled-text-area .dart.dart_keyword_1 {
    -styled-text-color: rgb(127, 0, 85);
    -fx-font-weight: bold;
}

.styled-text-area .dart.dart_keyword_2 {
    -styled-text-color: rgb(127, 0, 85);
    -fx-font-weight: bold;
}

.styled-text-area .dart.dart_single_line_comment {
    -styled-text-color: rgb(63, 127, 95);
}

.styled-text-area .dart.dart_multi_line_comment {
    -styled-text-color: rgb(63, 127, 95);
}

.styled-text-area .dart.dart_string {
    -styled-text-color: rgb(42, 0, 255);
}

.styled-text-area .dart.dart_string_inter {
    -styled-text-color: rgb(42, 0, 255);
    -fx-font-weight: bold;
}

.styled-text-area .dart.dart_builtin_types {
    -styled-text-color: #74a567;
    -fx-font-weight: bold;
}

.styled-text-area .dart.dart_doc {
    -styled-text-color: rgb(63, 95, 191);
}

.styled-text-area .dart.dart_doc_reference {
    -styled-text-color: rgb(63, 95, 191);
    -fx-font-weight: bold;
}
Finish
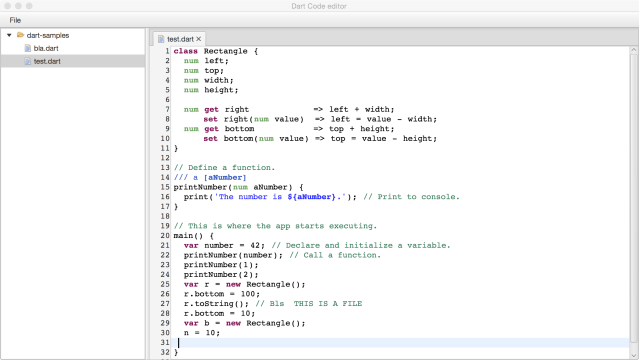
Now you can launch the application with the already generated Launch-Config. Afterwards use the Menu-Entry (“Select root folder …”) to set a root directory who contains dart-Files and double click on one of the files.

Pingback: Access Dart Analysis Server from Java | Tomsondev Blog
Pingback: e(fx)clipse 2.1.0 released | Tomsondev Blog
Hello, I wonder if it is good to use JavaFX, because when one falls secene builder of this page:
http://www.oracle.com/technetwork/java/javafxscenebuilder-1x-archive-2199384.html
He says:
WARNING: These versions of JavaFX Scene Builder May include components That do not Contain the latest security patches and are not recommended for use in production.
And I make an application thought for my work and I was thinking about JavaFX, but if I could not use in production then have to change technology for user interface. Someone might comment I would greatly appreciate it.
Why would not having SB available harm your final application. BTW – Gluon took on the maintenance of SceneBuilder
Where is your source code? for the IDE? thanks
https://github.com/BestSolution-at/efxclipse-codeeditor-samples.git
hello tom, what i need to do if i want to do the same with groovy i mean creating a javafx groovy editor in eclipse e4 application.
Most likely the best example we have is https://github.com/BestSolution-at/dartedit/tree/master/bundles – it’s not 100% up-to-date but I hope it helps to get you started otherwise please as questions at https://www.eclipse.org/forums/index.php/f/259/
hi tom, i followed this tutorial and i obtained a dart code editor but when i add parts to its in the application model ,the changes in the user interface are not being reflected. is this editor intended to stay in this form ??